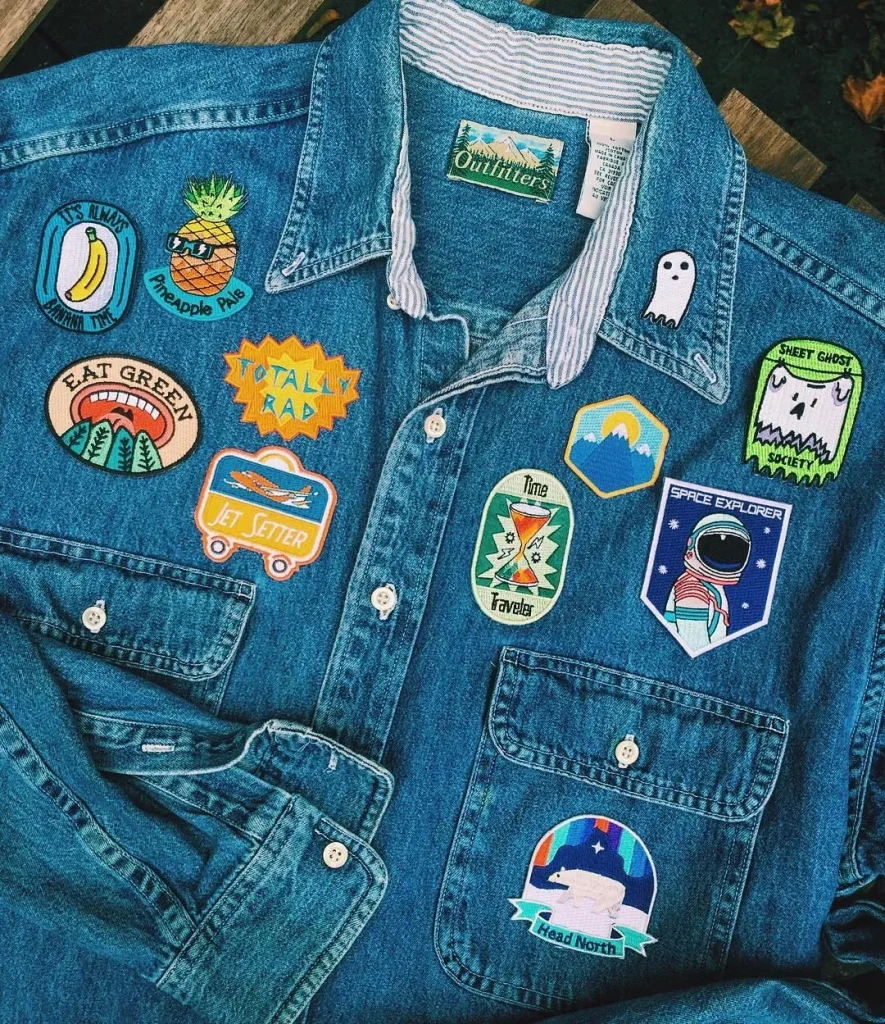
Patches for clothes transform worn items into lasting, stylish statements. This approach blends DIY clothing patches with practical repair, letting you extend the life of your favorite denim, tees, or jackets. Repair clothing with patches becomes a mindful habit that saves pieces you love. From iron-on patches for quick fixes to sew-on options for durability, the toolkit is versatile and beginner-friendly. Whether you’re patching a denim collar or mending a worn elbow, patches for denim and related styles offer a reliable, stylish way to refresh your wardrobe.
Viewed through a broader lens, this craft can be described as garment restoration through decorative fabric patches and appliques. It also reads as stitch-on repair accents or patchwork reinforcements that extend the life of denim, canvas, or knitwear. Alternative terms such as mending with patches, fabric embellishment, and upcycled patchwork capture the same idea in an LS-friendly way. By thinking in terms of durable adornment and sustainable stitching, you link practical repair with creative expression, a core tenet of upcycling with patches.
Frequently Asked Questions
What are the best patches for clothes for a beginner doing DIY clothing patches?
For beginners, iron-on patches offer quick results on lighter fabrics, while sew-on patches provide longer durability for items that see more wear. Patches for denim and embroidered or decorative patches are great next steps in DIY clothing patches.
How do patches for denim extend the life of jeans?
Denim patches are designed for heavy wear. Use iron-on patches for fast repairs on jeans, or sew-on patches for long-lasting reinforcement. Place patches on knees, elbows, or pockets and follow care guidelines to maximize durability.
Can I upcycle with patches to transform an old shirt?
Yes. Upcycling with patches lets you refresh an old shirt with color and texture. Plan a layout, mix patch sizes, and apply with iron-on or sew-on methods to keep the look cohesive.
What is the difference between iron-on patches and sew-on patches when repair clothing with patches?
Iron-on patches are quick to apply but may peel over time on heavy fabrics; sew-on patches require stitching but hold up better through repeated washing and wear. For patches used on daily wear, a mix of both can work well.
How should I plan patch placement and color when using patches for clothes?
Start with a dominant patch and add smaller accents to create balance. Choose a color story that echoes the garment base and match patch weights to fabric; patchwork can be decorative or restorative.
What maintenance steps help patches for clothes stay attached after washing?
Wash patches for clothes inside out on a gentle cycle with cold water. Air-dry or use low heat. Recheck edges after washing and re-seal with extra stitches or fabric glue if needed.
| Aspect | Key Points |
|---|---|
| Purpose and impact |
|
| Patch types and materials |
|
| Planning layout |
|
| Patching methods |
|
| Care and durability |
|
| Common issues and fixes |
|
| Tools and materials |
|