Patches on garments are a practical, stylish, and increasingly sustainable way to extend the life of clothing, cover wear and tear, and even express personal taste through color, texture, and playful or meaningful designs that tell a story about the wearer, and it remains a cornerstone of upcycling in modern wardrobes. If you’re wondering how to remove patches from clothing, this guide walks you through evaluating fabric, selecting the safest method, and quietly detaching the patch without damaging the base material, so you can start fresh with a clean surface ready for re-patching, for beginners and seasoned crafters alike. You’ll learn about the main patch types—iron-on, sew-on, and decorative embroidery—and the right tools, prep steps, and techniques that help ensure clean edges, secure adhesion, and minimal puckering whether you’re reviving an old denim jacket or mending a high-wear knee, with tips that you can apply across fabrics. Along the way, practical considerations such as choosing compatible patches, aligning with existing seams, using stabilizers for slippery fabrics, and planning the care routine are covered so patched garments can withstand washing, friction, and time without losing shape or color, and you’ll discover maintenance habits that protect both patch and fabric. By following clear, step-by-step guidance and applying thoughtful placement and stitching methods, you can extend fabric life, save money, and keep your wardrobe looking fresh while letting your patches contribute to your personal style, whether you’re patching for function, fashion, or a bit of both.
Beyond the exact wording, this topic is often explored through related terms like fabric repairs, appliques, textile mending, or cloth patches that reinforce wear areas while adding decoration. LSI-friendly language helps readers and search engines connect related ideas without repeating the exact keyword, using synonyms such as patchwork accents, garment reinforcements, or embroidery-based embellishments. Whether you call them iron-on emblems, sew-on patches, decorative patches, or fabric patches, the core idea remains the same: reinforcing fabric, concealing wear, and expressing personal style. Care and maintenance concepts align with this topic through expressions like proper washing, gentle handling, and fabric-safe finishing techniques that prolong patch life and prevent backings from peeling or stitching from loosening.
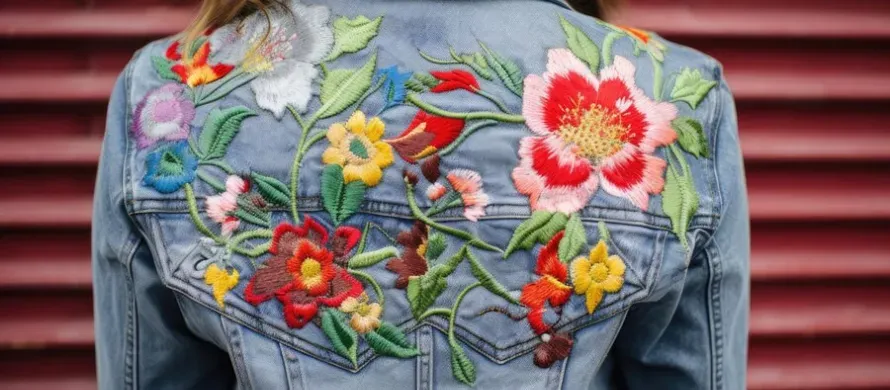
Patches on Garments: A Practical Guide to Removal, Replacement, and Care
Patches on garments are both practical and stylish, offering a way to extend the life of a favorite piece and add personal flair. By understanding patch types and proper care, you can decide when to remove, replace, or patch as needed, reducing waste and saving money.
This guide covers common patch styles—from iron-on to sew-on—and explains how to assess fabric integrity before starting. With the right tools and steps, patches can look crisp and durable for years.
How to Remove Patches from Clothing: Step-by-Step Techniques
If you’re curious how to remove patches from clothing, start by identifying whether the patch is sewn or ironed on and choosing the safest method for your fabric. Recognizing the patch type helps you select the least invasive approach and protects the fabric beneath.
Sewn-on patches require careful cutting of threads with a seam ripper, while iron-on patches may need gentle heat and adhesive removal. Taking your time protects the base fabric and makes the subsequent repair cleaner.
How to Replace Patches on Clothes Without Damaging Fabric
When considering how to replace patches on clothes, select a patch type that suits the fabric and the wear area. Size and placement matter to avoid bulk or seams rubbing against high-friction zones.
Prepare the surface with stabilizers if the fabric frays, position the patch with pins or tape, and choose the stitching or bonding method that will hold up to washing. Careful preparation helps the new patch sit smoothly and endure regular wear.
Care for Patched Garments: Washing, Drying, and Maintenance
Care for patched garments means treating patched areas with gentler cycles and cooler heat to preserve both the patch and the fabric. This approach helps extend the life of the patch and minimizes stress on the surrounding material.
Follow washing guidelines, air dry when possible, and inspect patches regularly to catch lifts early. Proper care for patched garments reduces fraying and keeps the overall appearance neat.
Patch Sewing Tips for Durable, Clean-Finish Patches
Patch sewing tips emphasize matching thread color, selecting the right needle, and finishing techniques to hide the stitches. A neat stitch line around the patch helps it blend with the garment and withstand washing.
Use lightweight stabilizers on slippery fabrics and practice on scrap material to perfect the technique before patching the garment. Fine-tuning tension and stitch length can dramatically improve durability and aesthetics.
Repair Fabric Patches: Troubleshooting and Quick Fixes
Repair fabric patches often involve addressing peeling edges, loose corners, or frayed borders with targeted stitching. Identifying the root cause—adhesive failure, thread breakage, or fabric wear—guides the right correction.
Quick fixes include resecuring corners with a few stitches, re-pressing edges with heat, and reinforcing with a border stitch to extend patch life. Regular checks after washing help you catch issues before they become permanent defects.
Frequently Asked Questions
Patches on garments: How to care for patched garments to maximize life and maintain appearance?
To care for patches on garments, wash with like colors on a gentle cycle and use a mild detergent. Turn patches inward to reduce friction, air-dry when possible, and avoid harsh bleach. Inspect patch edges regularly and resew any lifting seams; for iron-on patches, use a cloth between the iron and patch and avoid excessive heat. This routine helps patches stay secure and the fabric look fresh over time.
How to remove patches from clothing safely and prevent damage to the fabric?
Start by identifying whether the patch is sewn-on or iron-on. Sewn-on patches: carefully cut the border stitches with a seam ripper and remove threads, then trim fraying and reinforce the area if needed. Iron-on patches: gently lift a corner to test the adhesive, use a low-heat iron or adhesive remover if necessary, and wipe away residue with a mild detergent solution. Always work slowly to protect the underlying fabric.
How to replace patches on clothes effectively to refresh worn areas?
Choose the right patch type (iron-on, sew-on, or hand-embroidered) and prepare the fabric surface by trimming frayed edges and applying stabilizer if needed. Position the patch where it aligns with seams, then attach by sewing around the edge or following the patch’s instructions for heat. Secure edges with a second pass and press from the inside to flatten edges and reduce bulk.
What are essential patch sewing tips for applying patches on garments across different fabrics?
Key patch sewing tips include matching thread color to the patch or garment, using a suitable needle for the fabric, and employing a zigzag or small running stitch around the edge. For slippery fabrics, consider fusible interfacing to stabilize the area. Use pins to hold the patch in place and practice on scrap fabric before final application.
When fabric patches start to fail, how to repair fabric patches without creating new wear?
If a patch shows wear, resew the border with a fresh stitch line and consider adding a top stitch for extra security. Reinforce the surrounding fabric with stabilizer or interfacing, trim loose threads, and avoid over-stretching the area during washing. If needed, replace the patch with a new one and follow proper attachment steps to minimize further wear.
Patches on garments: what care practices help keep iron-on and sew-on patches lasting?
For longevity, wash on gentle cycles, turn patches inward to reduce friction, and avoid harsh chemicals. Dry flat or on low heat; if using a dryer, select a low-heat setting. When ironing, use a press cloth for sewn patches and a heat-safe barrier for iron-on patches, and always press from the garment’s inside. Regularly check edges and resew or re-adhere as needed to maintain durability.
| Topic | Key Points |
|---|---|
| Purpose and benefits | Patches extend the life of garments, cover wear, and add personal style; understanding removal, replacement, and care helps save money and reduce waste. |
| Patch types and selection | Iron-on patches use heat-activated adhesive; sew-on patches require stitching; patches can be decorative, functional, or both; choosing the type guides removal and care. |
| Tools and materials | Sharp seam ripper, small scissors, hand sewing needle and thread, fabric marker, pins or fabric tape, iron and ironing board, fusible interfacing or stabilizer, and optional fabric glue. |
| Removing patches | Sewn-on patches: cut threads along the border with a seam ripper and release the patch; Iron-on patches: check adhesive, use heat if needed, and remove glue with alcohol; clean area before patching again. |
| Replacing patches | Choose patch type; prepare fabric surface; position patch; attach patch (sewn: running or zigzag stitches; iron-on: follow manufacturer instructions), secure edges with a second pass, and press from the inside if possible. |
| Care and maintenance | Wash with like colors on a gentle cycle, air dry or use low heat; iron with a barrier for iron-ons and a press cloth for sewn patches; inspect patches regularly and resew if edges lift. |
| Common mistakes and quick fixes | Rushing, using the wrong adhesive or heat, skipping stabilizers on stretch fabrics, and misalignment. Fix peeling by reattaching with fresh stitches or re-pressing; reinforce frayed edges with a zigzag stitch. |
Summary
Patches on garments offer a practical way to extend clothing life while adding character and style. Understanding the difference between iron-on and sew-on patches helps you choose the best approach for removal, replacement, and care, preserving fabric integrity. With the right tools, step-by-step methods, and mindful maintenance, patched pieces can remain visually appealing and durable for years. Proper preparation, secure attachment, and gentle care prevent peeling or fraying, fostering a sustainable, personalized wardrobe. Embracing patches on garments turns repairs into intentional design, allowing you to refresh old items and express your style with confidence.