
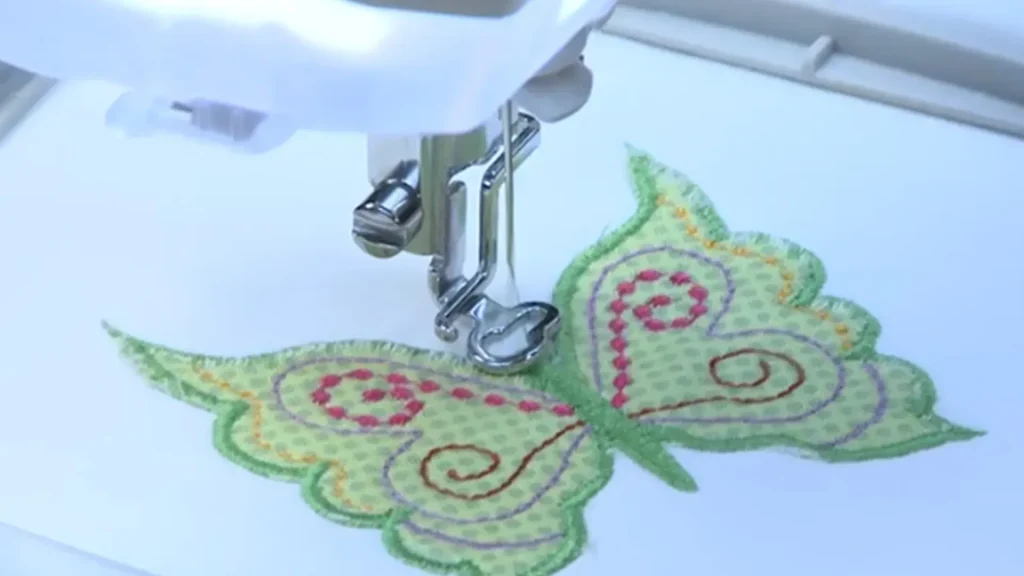
Digitizing Embroidered Design is the hidden craft behind the crisp, professional stitches you admire in apparel, home decor, and personalized gifts. When a sketch becomes stitch-ready, the process blends artistic vision with embroidery digitizing techniques, shaping the journey from sketch to stitch into a reliable embroidery design workflow. With careful choices in digitizing software for embroidery and a clear plan for stitch types and density, designers turn ideas into machine-readable stitch data. Understanding vector-to-stitch conversion helps ensure clean outlines and smooth color transitions, reducing fabric distortion and improving overall results. A thoughtful workflow, tested on different fabrics, ensures the final embroidery looks professional, lasts, and performs reliably.
Beyond the clean outlines, practitioners describe the embroidery digitization journey as transforming artwork into stitch data that a machine can read. Other terms you’ll encounter include the embroidery design workflow, the art-to-stitch pipeline, and the vector-to-stitch conversion, all aimed at predictable results. This approach emphasizes fabric behavior, thread density, underlay, and color management to align creative intent with machine performance. Whether you work with manual digitizing, semi-automatic tracing, or dedicated digitizing software for embroidery, the goal remains turning sketches into stitch instructions that sew cleanly.
Digitizing Embroidered Design: From Sketch to Stitch
Digitizing Embroidered Design is the quiet engineering behind every crisp stitch you admire, blending artistic concept with technical know-how to turn sketches into machine-readable instructions. In this realm, embroidery digitizing is more than tracing lines; it’s a craft that plans thread behavior, stitch types, and fabric response so the final piece reads clearly to eye and machine alike. The journey from concept to needle is captured by the phrase from sketch to stitch, reminding designers that each stitch is mapped from a drawn idea.
During digitizing, practitioners consider vector-to-stitch conversion, selecting satin for outlines, fills for large color fields, and running stitches for fine details. They balance stitch density, apply underlay, and plan color breaks so the design sews cleanly on diverse fabrics. A solid workflow relies on a capable digitizing software for embroidery and a methodical approach that harmonizes aesthetics with machine performance.
The Embroidery Design Workflow: From Concept to Finished Stitch
An embroidery design workflow encompasses concept development, sketch conversion, digitizing, color planning, and production testing. It is a repeatable process designed to produce stitches that read clearly to both the eye and the machine, ensuring reliability across productions. A well-defined workflow also accounts for thread behavior, fabric foundation, and compatible machine formats so a design translates seamlessly from idea to finished item.
Framing the process as a workflow helps optimize critical steps such as vector-to-stitch conversion, density tuning, and underlay selection. It also emphasizes selecting the right digitizing software for embroidery and managing color stops to preserve the intended palette during production. Regular testing on fabric scraps validates performance before committing to full-scale embroidery runs.
From Sketch to Stitch: Essential Steps in Digitizing
Starting with a hand or digital sketch, the essential steps move from sketch to stitch through careful digitizing: scan the drawing, clean the image for contrast and clarity, and trace key shapes to create vector paths. Next, assign stitch types to different areas—satin for borders, fills for large color blocks, and running stitches for subtle details—while planning density and underlay to ensure stable coverage.
After the initial tracing, set color breaks and decide the order of color changes. Export the final stitch file in a machine-readable format and test the design on fabric scraps to confirm stitch directions, density, and pull compensation. This iterative cycle—mapping artistic intent to stitch blocks—embodies the sketch-to-stitch philosophy and yields reliable results across sizes and fabrics.
Digitizing Software for Embroidery: Choosing the Right Tools
Selecting digitizing software for embroidery centers on tools that support a smooth sketch-to-stitch path. Look for precise manual digitizing capabilities, supported automatic or semi-automatic options, and robust control over stitch types, lengths, directions, and densities. Important features also include underlay patterns, density and pull compensation controls, color management, and clear multi-color stop workflows.
Consider machine compatibility and export formats (DST, PES, EXP, and similar), ensuring color information transfers reliably and that stitch data remains robust across platforms. While the exact software name matters less, the ability to leverage its features consistently to produce high-quality embroidery digitizing results is what sustains a reliable, scalable workflow.
Vector-to-Stitch Conversion: Turning Shapes into Seamless Stitch Data
Vector-to-stitch conversion serves as the bridge between scalable artwork and stitch-ready data. Clean vector paths translate edges into accurate outlines, while curves must be converted into stitch blocks that a embroidery machine can execute. Proper conversion preserves detail without overloading fabric with dense fills or excessive stitch counts.
In practice, conversion benefits from thoughtful planning of shapes, color blocks, and stitching order to maintain crisp boundaries and even coverage. Apply appropriate underlay and set density during the conversion process to reduce distortions, and preview the design on fabric similar to production to validate tension, coverage, and edge sharpness before final embroidery.
Quality Assurance in Digitizing: Testing, Color Management, and Pitfalls
Quality assurance in digitizing is an ongoing discipline that begins once stitch data is generated. Test on fabric scraps to observe how threads behave under real sewing conditions, watching for puckering, stitch splitting, or shading artifacts. Use these tests to adjust density, underlay, and pull compensation before moving to production.
Color management ensures accurate thread tones under different lighting, while clean color stops and predictable color changes support reproducible results. Awareness of common pitfalls—overly dense fills, inadequate underlay, narrow satin columns, and inconsistent pull compensation—helps designers refine their process. A structured QA checklist turns potential misreads into reliable, repeatable embroidery outcomes.
Frequently Asked Questions
What is digitizing embroidered design and why is it crucial for embroidery projects?
Digitizing embroidered design is the process of turning artwork into stitch data that embroidery machines read. It’s the core of the embroidery design workflow, translating a sketch into carefully planned stitches by considering thread types, densities, pull, stitch directions, and fabric behavior to produce durable, clean results.
How does the from sketch to stitch journey unfold in practice?
The journey starts with scanning or tracing a high-contrast sketch, then creating vector paths, assigning stitch types (satin for edges, fills for large areas, running stitches for details), balancing density and underlay, and exporting a machine-readable stitch file (DST, PES, etc.). It’s the from sketch to stitch path in action.
What role does the embroidery design workflow play in quality outcomes?
The workflow coordinates all steps—from sketch preparation and color breaks to underlay, stitch directions, and testing—ensuring consistent, repeatable results across fabrics and machines. A solid workflow supports reliable output in digitizing embroidered design.
What should I look for in digitizing software for embroidery to support quality results?
Choose digitizing software for embroidery that offers manual and semi-automatic/double-check editing, precise control over stitch types and density, effective underlay options, color management, and compatible export formats (DST, PES, EXP). A strong toolset supports a robust embroidery digitizing process.
How does vector-to-stitch conversion fit into digitizing embroidered design?
Vector-to-stitch conversion converts vector paths into stitch blocks, preserving edges from the sketch while enabling efficient stitch planning. This approach helps define outlines with satin or run stitches and then build fills and details during the embroidery digitizing steps.
What common pitfalls should I avoid in digitizing embroidered design, and how can workflow help?
Common issues include overly dense fills, inadequate underlay, poor color separation, narrow satin columns, fabric puckering, and improper pull compensation. A disciplined embroidery design workflow—planning density, underlay, color breaks, and testing on fabric scraps—prevents these problems.
| Aspect | Key Points |
|---|---|
| Understanding the Digitizing Embroidered Design Process |
|
| From Sketch to Stitch: the Sketch-to-Stitch Journey |
|
| Essential Tools: Digitizing Software and Hardware |
|
| Preparing Your Sketch for Digitizing |
|
| The Digitizing Process: Step-by-Step to Great Embroidery |
|
| Common Pitfalls and How to Avoid Them |
|
| File Formats, Exporting, and Compatibility |
|
| A Practical Example: Digitizing a Logo from Sketch to Stitch |
|
| Speed, Quality, and Consistency in the Digitizing Embroidered Design Process |
|
