
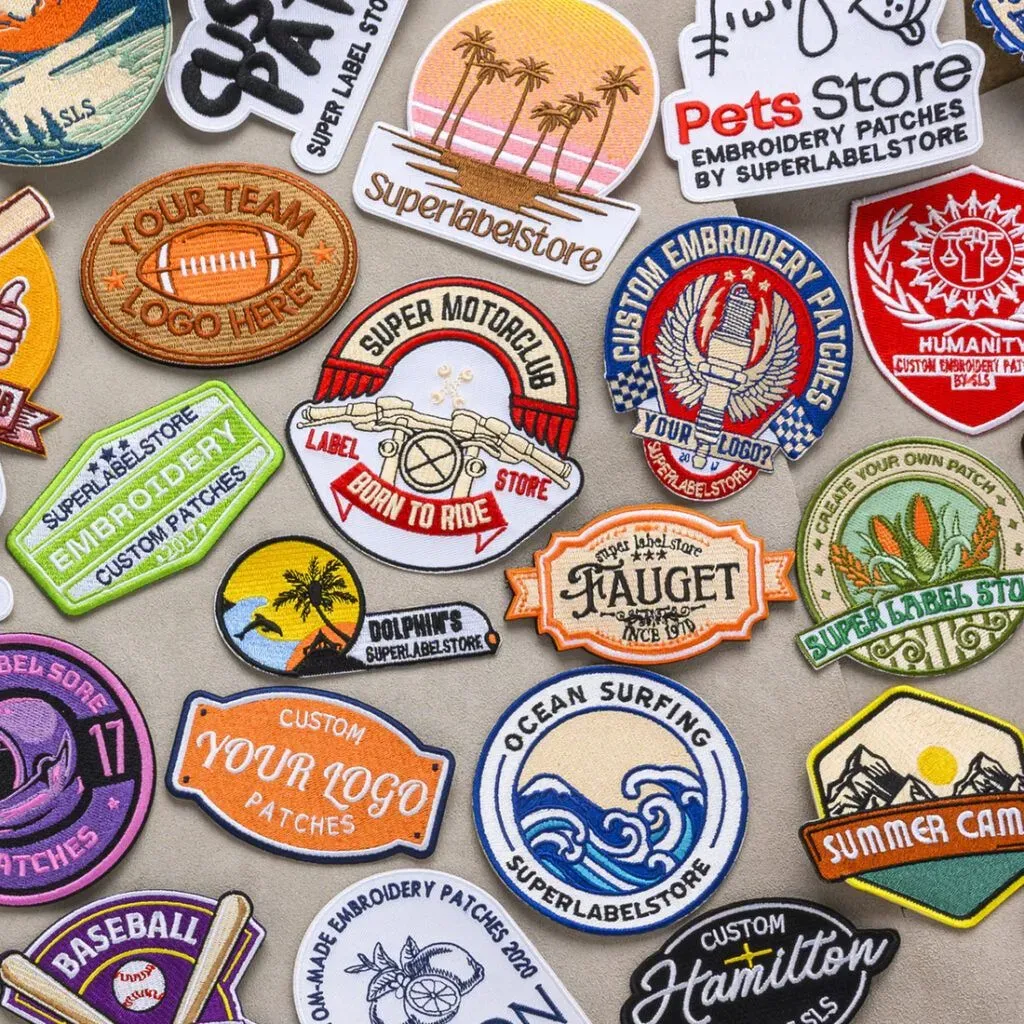
Custom patches have become a universal way to celebrate identity, loyalty, and creativity. Whether you’re outfitting a sports team, promoting a brand, or crafting a unique accessory line, these patches offer a tangible, collectible feel that digital graphics alone can’t replicate. The patch design process spans concept, digitization, and finishing, helping you translate ideas into high-quality patches that endure wear and wash. From backing options to edge finishes, this guide covers practical decisions that influence durability, cost, and application practicality across fabrics. With careful material selection and color management, you’ll be prepared to bring your vision to life on fabric in a way that looks polished and durable.
Beyond the direct term patches, this field embraces badge customization, fabric emblems, and branded insignias that can be sewn, iron-on patches, or attached with hook-and-loop. Think of it as a craft around patches used for embroidery-style designs, with careful attention to legibility and durability for small details. The process aligns with a familiar workflow—from ideation and digitization to color management and finishing—ensuring consistent, brand-ready results. With the right backing and materials, you can choose between permanent sew-on options or removable solutions that fit your project timelines.
From Concept to Creation: Mastering the Patch Design Process for Custom Patches
Turning an idea into a tangible badge starts with a clear concept and purpose. For custom patches, define where the patch will live, who wears it, and what message it conveys. Whether it’s a sports team insignia, brand co-branding, or a club emblem, aligning design with the intended garment and audience ensures legibility and impact. Early decisions about size, color palette, and patch type influence aesthetics as well as production constraints.
A solid brief streamlines the patch design process. Gather your vector logo, any required text, color codes, and preferred backing and edge finishes. Decide on embroidered, woven, or other patch types based on detail level and durability. Review competitors and niche examples to balance originality with recognizability while staying mindful of copyright and trademark issues.
Choosing the Patch Type: Embroidered vs Woven for Your Brand
Patch type choices fundamentally shape the look and feel of your badges. Embroidered patches typically feature denser stitch work, making bold outlines and crisp text ideal for signal and branding. Woven patches, by contrast, use a tighter weave that renders fine detail and smoother gradients, often with a lighter hand and weight. Both can be finished with merrow borders or laser-cut edges, and each option carries its own durability and cost profile.
Beyond these core categories, consider PVC or laser-cut fabric patches for specialty aesthetics or wear-resistance. The decision should align with design complexity, color requirements, budget, and the intended use—whether battle-ready on uniforms, subtle on accessories, or removable via Velcro for swapping logos.
Digitizing and Color Management: Turning Art into Durable Stitch Patterns
Once the concept and patch type are set, the design moves into digitizing—the process of converting artwork into stitch files that embroidery machines understand. A good digitizer translates line weight, color blocks, and shading into stitch types, densities, and paths that optimize durability and appearance. Color management matters most here, because thread colors rarely map perfectly to screen or print colors, so proofs and adjustments ensure the final patch aligns with brand standards.
In this phase, legibility at small sizes is critical. Simplify complex elements, use bold outlines to preserve contrast, and plan for appropriate densities on woven patches where gradients render differently. If multiple colors are involved, manage a palette that minimizes thread changes and keeps production costs predictable.
Backing, Edges, and Application: Attachments and Finish of Patches
Backing options dictate how the patch will attach to fabric. Common choices include iron-on backs, sew-on backs, and Velcro or hook-and-loop for removable usage. Iron-on backs rely on heat-activated adhesive to bond to fabric, while sew-on backs require stitching for permanence. Velcro backs add interchangeability, ideal for clubs or teams that rotate logos.
Edge finishes also influence aesthetics and durability. Merrow edges provide a clean, rounded border, while laser-cut edges offer a sharp, modern look. Each backing and edge choice affects production cost and application constraints, so align these finishes with the patch’s purpose, target fabrics, and user experience.
Materials, Size, and Color Strategy in Patch Fabrication
Patch fabrication starts with material selection. Embroidered patches typically use twill or felt bases, with polyester or rayon embroidery threads. Woven patches rely on the weave type and thread density, which affects washability and flexibility. Size is another critical factor: larger patches stand out more but require more backing and thread, while smaller patches demand careful edge finishing to preserve legibility.
Color management remains essential. Barcodes, corporate colors, and Pantone references aren’t always exact in thread form, so using color decks and stitch palettes helps achieve a close match. Often a color-matched proof is produced before full production, especially for large runs or brand-sensitive projects.
Production, Quality Control, and Cost Management for High-Quality Patches
Sampling is a crucial step to validate size, color, stitching density, and attachment method before full production. A physical sample allows you to spot misalignment, loose threads, or edge fraying, and it guides necessary revisions. Expect a few iterations for complex designs or multi-color palettes, and maintain clear communication to reduce costs and lead times.
Once approved, production scales up with lead times affected by patch type, size, color count, backing, and manufacturer capacity. Budgeting should account for setup fees for digitized files and potential color changes between proofs and final patches. Understanding MOQ and exploring no-MOQ options for prototypes helps startups and hobby projects bring patches to market without overcommitting.
Frequently Asked Questions
What’s the difference between embroidered patches and woven patches for custom patches, and how do I choose the right type?
Embroidered patches use dense stitching for bold outlines and crisp text, making them ideal for strong branding and durability. Woven patches use a tighter weave that captures fine detail and subtle gradients with a lighter feel. Choose based on design complexity, color requirements, weight, and budget, while considering backing and edge finishes to optimize durability for your custom patches.
How does the patch design process affect the final appearance and durability of custom patches?
The patch design process shapes legibility, color mapping, and stitch density. Digitization converts artwork into stitch files; simplifying elements and using bold outlines improves readability on smaller patches. Proper planning and proofs help ensure durable, high-quality custom patches that match your brand.
What backing options exist for custom patches, and how do iron-on patches compare to sew-on backs?
Backing options include iron-on, sew-on, and removable options like Velcro. Iron-on patches use heat-activated adhesive for quick application; sew-on backs require stitching for permanence; Velcro backs enable interchangeability. Edge finishes such as Merrow or laser-cut borders complement backing choices for your patch’s look and wear.
How is color management handled in the production of custom patches to ensure brand colors stay consistent across embroidered and woven patches?
Color management uses color decks and thread charts to map artwork to actual thread colors. Proofs are reviewed to ensure the final patches match brand standards, with adjustments made for thread vs. screen color differences. Pantone references and careful digitization help maintain consistency across embroidered and woven patches.
What are typical lead times and costs for custom patches, and how can I optimize the quote?
Lead times depend on patch type, size, color count, backing, and manufacturer capacity. Costs vary by patch type and finishing (e.g., merrow vs laser-cut). To optimize budgeting, simplify the design, reduce color changes, choose standard backings, batch orders, and request quotes for both small and large runs, including any setup fees.
What steps ensure quality and consistency across a full line of patch designs in a collection?
Start with a clear concept and a standardized patch design process. Use sampling to validate size, color, and attachment, then maintain consistent backing, edge finishes, and color palettes across the collection. Require proofs and close collaboration with the patch manufacturer to catch issues early and ensure uniform quality.
| Aspect | Key Points |
|---|---|
| Purpose & Vision | Define the patch’s purpose, audience, garment/item, and mood; develop a clear brief with logos, colors, size constraints, and patch type while checking for copyright/trademark considerations. |
| Patch Types | Two core categories (embroidered vs woven) plus options like PVC or laser-cut patches; choose based on design complexity, color needs, budget, and wear. |
| Digitizing & Color Management | Convert art to stitch files; manage thread colors; proofs help align to brand colors; ensure legibility and appropriate densities. |
| Backing & Edge Finishes | Iron-on, sew-on, or Velcro backs; edge finishes like merrow or laser-cut borders affect look and application. |
| Materials, Size & Color | Choose base material (twill/felt), thread types, and consider size impact on visibility; color management aims for closest thread-to-color match. |
| Sampling & Quality Control | Create physical samples to verify size, color, stitching, and attachment; expect revisions to ensure quality. |
| Production Timeline & Lead Times | Factor in patch type, size, colors, backing, and manufacturer capacity; plan for proofs, color changes, and MOQ. |
| Cost Considerations | Costs rise with stitching density, color changes, and backing/edge choices; simplify design or batch production to control budget. |
| Applications & Brand Consistency | Patches suit sports, clubs, brands, cosplay, and merchandise; maintain consistent colors and borders across collections. |
| Working with Manufacturers | Seek experienced suppliers, clear proofs, transparent quoting, and samples; collaborate on digitization and backing/edge decisions. |
| DIY vs Professional Production | DIY can work for small projects, but professionals offer scalable quality and access to embroidery/weaving expertise. |
| Trends & Sustainability | Sustainable materials, eco-friendly inks, and durable backings are increasingly common; stay current with shapes, finishes, and palettes. |
Summary
Conclusion: Your Path to High-Quality Custom Patches — From concept to finished product, understanding each stage helps you deliver patches that look great, wear well, and tell your brand story. Start with a clear concept, choose the right patch type, invest in thoughtful digitization and color management, and align backing, edge finishes, and materials with your intended use. Through careful sampling, realistic timelines, and transparent collaboration with a trusted manufacturer, you can turn creative ideas into durable, market-ready patches. Whether you prefer embroidered textures for bold impact or woven detail for subtle sophistication, a structured process and a focus on quality bring your custom patches to life.
