Remove Embroidered Patches Without Damaging Fabric is a practical skill that helps you refresh jackets, bags, and tees without compromising the garment. By choosing fabric-safe approaches and relying on safe patch removal methods for fabrics, you can remove patches cleanly while preserving the surrounding texture. Guidance on safe removal of patches, along with patch removal techniques fabric safe, helps you avoid fraying and heat damage. You’ll also discover ideas on how to reuse embroidered patches. This introductory guide blends practical steps with care tips to keep fabrics looking new while enabling creative reuse.
To broaden the language beyond the base keyword, think in terms like detaching decorative patches, removing embroidery designs, or lifting patches without harming the fabric. LSI-friendly terms such as fabric-safe detachment, garment-safe removal, and residue-free techniques help explain the same idea to different audiences. Other expressions like how to refresh clothing by shedding patches or strategies for reusing patch material align with common search intents. Ultimately, the core idea remains to work slowly, protect delicate fibers, and consider reuse opportunities as you master the process.
Remove Embroidered Patches Without Damaging Fabric: A Safe, Step-by-Step Guide
Removing embroidered patches cleanly starts with understanding the attachment method and choosing a fabric-friendly approach. When you aim to Remove Embroidered Patches Without Damaging Fabric, you reduce the risk of puckering, fraying, or texture change by proceeding slowly and respecting the garment’s fibers. A calm, methodical process helps preserve the surface for future reuse or reassembly.
Begin with a quick inspection: identify whether the patch is sewn, iron-on, or a mix. Gather a small toolkit, including a seam ripper, fine-tipped tweezers, scissors, a hair dryer or heat gun on a gentle setting, and a fabric-safe adhesive remover for residue. Prepping the area on a flat surface with good lighting makes it easier to follow the stitch paths without pulling on the fabric.
With the right mindset, you can separate the patch from the fabric without damage. Take your time releasing threads, testing small motions first, and stopping if you encounter resistance. The goal is a clean patch removal that leaves the fabric intact and ready for reuse or a new design.
Sewn-On vs Iron-On: Patch Removal Techniques for Fabric-Safe Results
Sewn-on patches require carefully cutting threads along the stitch line, while iron-on patches rely on heat-activated glue. Understanding these differences helps you choose the safest path and minimizes fabric distortion. This distinction is the foundation of responsible patch removal techniques fabric safe.
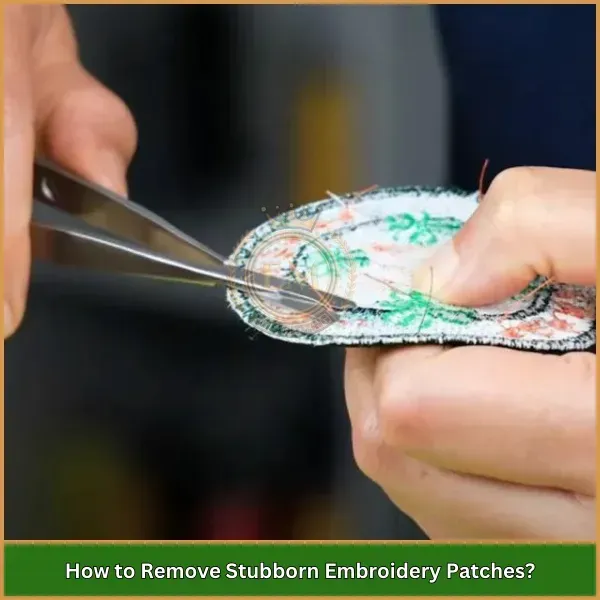
For sewn patches, work from the backside when possible, loosening stitches with a seam ripper and releasing sections gradually. For iron-ons, soften the adhesive at the edge with gentle heat, then lift the patch slowly, stopping at the first sign of resistance. In both cases, keep the fabric taut and support the surface to avoid pulling or stretching.
The overarching rule is to proceed with patience, using light, controlled motions. Slow, deliberate work reduces the chance of fibers pulling or becoming frayed, fulfilling the promise of safe patch removal methods for fabrics.
Dealing with Adhesive Residue: Safe Patch Removal Methods for Fabrics
Adhesive residue is a common aftermath of patch removal, especially with iron-on designs. Tackling sticky glue without harming fabric requires a measured approach and the right solvents. Start with the gentlest option and test any solvent on a hidden area to prevent color loss or texture change.
If residue remains after the initial detach, dab with a small amount of rubbing alcohol on a cotton swab or use a fabric-safe adhesive remover. Gently work the area from the outside inward, and rinse with mild detergent and water afterward. Avoid aggressive scrubbing that could abrade fibers.
Finish by inspecting the surface for any pilling, glaze, or melted fibers. A light wash and air dry help restore the fabric’s texture, and a tiny stabilizing stitch from the inside can reinforce delicate areas if needed.
How to Reuse Embroidered Patches: Creative Paths After Removal
If you’re curious how to reuse embroidered patches, the previous surface isn’t the only destination. Salvaged patches can take on new life on other garments, bags, or accessories, turning old hardware into a fresh design. This reuse mindset extends the value of each patch and the fabric it once covered.
Consider a patch collage on a denim vest, a decorative panel on a tote, or even a fabric badge on a hat. You can also trim edges cleanly and apply patches to pockets, cuffs, or straps, using zig-zag stitching or a small satin stitch. The idea is to preserve the character of the patch while integrating it into new textile art.
If you want specific guidance, you can explore ideas like creating a patch-based embroidery piece or turning leftover patches into framed decor. For those seeking practical steps, start with scrap fabric to test placement and stitching, then move to the final garment.
Caring for Fabric After Patch Removal: Cleaning, Repair, and Colorfastness
After removing patches, the fabric may show minor wear or adhesive traces. Caring for the surface begins with a cautious wash to remove oils, residues, and fibers from around the patch area. Dry the area completely before any further work to prevent moisture from affecting fibers.
If you notice loose threads or slight thinning, reinforce the area from the inside with a tiny hand-sewn stitch or darning to maintain strength. Always test colorfastness on a hidden spot if you used any solvents, and avoid high heat during any subsequent ironing.
Color management matters, especially on dark denim or light fabrics. Use color-safe detergents and consider a fabric-protective finish if the area will endure regular washing. These steps help preserve the garment’s texture and extend its lifespan after patch removal.
Common Mistakes to Avoid When Removing Patches and How to Prevent Them
Rushing removal is a frequent culprit of fabric damage. Ripping patches off too quickly can tear fibers at the edge. Adopt a slow, methodical pace to maintain the garment’s integrity and stay aligned with the goal of clean removal.
High heat on delicate fabrics or iron-on patches can cause scorching or glue residue to bake into fibers. Keep heat under control and test heat on scrap fabric or inconspicuous areas first. This precaution helps you avoid permanent discoloration or texture changes.
Ignoring residue or skipping a test patch can leave behind stiffness or discoloration after washing. Address adhesive remains with a gentle solvent test, then rinse thoroughly. By building a routine of careful checks, you protect fabric quality during and after patch removal.
Frequently Asked Questions
Remove Embroidered Patches Without Damaging Fabric: What is the safest method for sewn-on and iron-on patches?
For sewn-on patches, access the wrong side and use a seam ripper to release stitches slowly, working one edge at a time. For iron-on patches, gently loosen the edge with low heat, then peel away, stopping if you feel resistance. After removal, check for residue, clean with a fabric-safe solvent or mild detergent, and inspect for any fabric damage or fraying.
Remove Embroidered Patches Without Ruining Fabric: What are patch removal techniques fabric safe for delicate textiles?
Work slowly and avoid high heat or aggressive pulling. Use fine tools like tweezers and a seam ripper to minimize fibers damage. If adhesive remains on delicate fabrics, apply a small amount of fabric-safe adhesive remover or rubbing alcohol to a cotton swab and test first in an inconspicuous spot, then blot away.
How to Reuse Embroidered Patches After Removal?
Store patches clean and flat. Reattach elsewhere on the garment with a tight zig‑zag or satin stitch, or create a patch collage on a single fabric piece. Small scraps can become decorative accents on accessories, while fusible webbing can help achieve clean, edge-to-edge placement when fabric allows.
Safe Patch Removal Methods For Fabrics: What are practical steps to avoid damage and residue?
Test any cleaner or solvent on a hidden area first. Use low heat and brief contact for iron-on patches, and avoid forcing patches off with heat or force. If glue residue remains, dab with a fabric-safe adhesive remover on a cotton swab, then rinse and launder as needed.
What Tools and Prep Do I Need to Remove Embroidered Patches Without Damaging Fabric?
Gather a seam ripper, small sharp scissors, fine-tipped tweezers, a hair dryer or heat gun on low, fabric-safe adhesive remover or rubbing alcohol, cotton swabs, and matching thread for touch-ups. Prepare a clean workspace with good lighting and take your time for best results.
How Should I Care for Fabric After Remove Embroidered Patches Without Damaging Fabric to Ensure It Remains Intact and Ready for Reuse?
Gently wash or spot-clean the area and dry completely. Inspect for pulled threads or thinning around the patch area and reinforce any loose threads from the inside. Test colorfastness if cleaners were used, then decide whether to reuse the fabric panel or relocate the patch to a new area.
| Aspect | HTML Summary |
|---|---|
| Goal |
|
| Patch Types |
|
| Tools & Prep |
|
| Sewn-on Removal Steps |
|
| Iron-on Removal Steps |
|
| Post-removal Care |
|
| Fabric Considerations |
|
| Common Mistakes |
|
| Reuse & Creativity |
|
Summary
Remove Embroidered Patches Without Damaging Fabric is a practical skill that preserves garment integrity while expanding opportunities for reuse and upcycling. By understanding patch types, preparing the right tools, and using fabric-safe removal methods, you can remove patches cleanly, minimize distortion, and repurpose the fabric or patch for new designs. This guide covers sewn-on and iron-on patches, fabric considerations, post-removal care, and creative reuse ideas to help you maintain textile quality and extend the life of your items.