Custom patches 101 is more than a decorative accessory; it’s a practical guide to turning an idea into a tangible item that brands, teams, clubs, and creators can wear with pride, while serving as a flexible framework for ideation, design, production planning, marketing alignment, and long-term branding strategy, and this framework applies equally well to small teams and large enterprises, helping stakeholders from product designers to procurement specialists communicate in a shared language. Whether you’re launching a new product line, building team identity, or creating commemorative patches for an event, the journey from concept to production involves design decisions, material choices, testing, sourcing, inventory planning, compliance considerations, and a well-defined manufacturing process that balances aesthetics, durability, risk, and cost; it also clarifies priorities such as color fidelity, thread counts, backing compatibility, and the intended wash or wear conditions for different products. In this guide, we’ll walk through the core stages of the custom patch creation pipeline, highlight common pitfalls, and provide actionable tips to optimize quality, lead times, and cost, including a careful look at the patch design process while noting tradeoffs between complexity and legibility, color management, and file standards for production-ready artwork; we’ll also discuss file delivery guidelines, proofing cycles, and how to align design intent with production constraints. By the end, you’ll have a clear understanding of how the concept maps to production, and you’ll be equipped to communicate effectively with suppliers to obtain patches that look great, wear well, and stay within budget through structured briefs, detailed specifications, samples, and timely feedback; the guidance also covers risk mitigation, cost containment, and contingency planning to keep projects on track even when iterations are needed. This approach helps brands, clubs, and creators align artwork with material realities, streamline approvals, orchestrate vendor evaluations, and set realistic expectations for timelines, ensuring a smooth transition from idea to finished patches that deliver on value and strengthen ongoing merchandising programs; ultimately, the framework fosters collaboration, reduces rework, and supports scaling patch programs across multiple collections, events, or leagues.
From a different angle, the topic can be described as bespoke badge creation, garment emblems for branding, or embroidered identifiers for teams, clubs, and events—terms that signal the same core idea through varied framing. LSI-friendly terms such as personalized patches, sew-on emblems, and production planning for fabric patches help readers connect design intent with manufacturing realities, while reinforcing how materials, backing options, and finishing touches affect durability and appeal. Understanding this web of related concepts supports informed conversations with suppliers, improves expectations, and helps buyers map timelines, costs, and quality checks to concrete results.
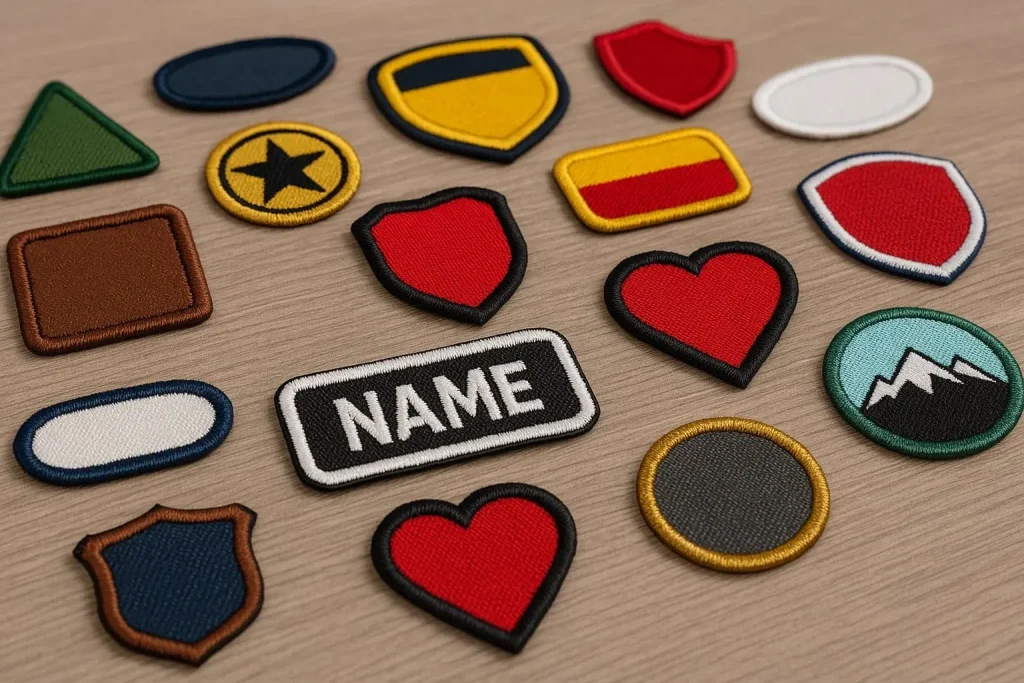
From Concept to Creation: The Patch Design Process and Custom Patch Production
The journey starts with a clear concept that defines purpose, size, shape, and color. In the patch design process, translating artwork into production-ready files hinges on clean vector art, precise color separations, and a concise style guide. By outlining essential questions up front—shape options, minimum and maximum sizes, key colors, and attachment methods—you can streamline discussions with suppliers and reduce back-and-forth. This lays a solid foundation for efficient custom patch production that stays faithful to your brand and artwork.
As ideas move from concept to render, the emphasis shifts to practical constraints and production realities. Providing vector files (AI, EPS, or SVG) and a brief style guide helps ensure the final patch matches expectations. If the design includes intricate details, consider simplifying elements to maintain legibility at smaller sizes, a common requirement in embroidery patches manufacturing and other patch formats. Clear guidance on backing, edge finish, and thread counts further aligns design intent with manufacturing outcomes.
Material and Construction Choices That Define Embroidery Patches Manufacturing
Material choices directly influence appearance, durability, and how the patch performs in its end-use environment. In embroidery patches manufacturing, you’ll evaluate surface techniques (standard embroidery, satin stitching, or chenille for texture), border options (merrow edge for a finished look or a heat-cut edge for a flatter silhouette), and backing types (iron-on, sew-on, or hybrid). Each choice affects wearability, washability, and the ease of application for different products.
Beyond aesthetics, material selection aligns with function. Rugged outdoor gear benefits from stronger backings and durable threads, while fashion patches may prioritize bright color reproduction and a lighter touch. In this stage, you’ll also decide on thread counts, color matching systems, and how to minimize color drift between the artwork and the final patch, all of which are critical for consistent results across production runs.
Custom Patches 101: Prototyping, Approvals, and the Patch Production Checklist
Before committing to a full production run, prototyping serves as a practical test of design, material behavior, and durability. Expect iterations that check color accuracy against Pantone references or swatches, stitch density, edge integrity, and legibility of any small text. This is where your decision-making begins to shape the efficiency of custom patch production, reducing surprises later in the timeline.
A formal patch production checklist helps compress the approval cycle and keeps everyone aligned. Use it to verify design feasibility, backing performance, and wash tests, then translate approvals into concrete specifications for the factory. With a clear proto-to-production path, you’ll shorten lead times and gain predictability, ensuring the patch design process yields a production-ready result that matches your original concept.
Sourcing, Quotes, and Managing Custom Patches Cost Efficiently
Once a prototype is approved, effective sourcing and transparent cost documentation become critical. You’ll encounter line-item factors such as material costs, tooling and setup fees, color matching, MOQs, and unit pricing at scale. By requesting detailed quotes and a per-patch price at target quantities, you gain visibility into the custom patches cost and can compare options across suppliers with greater confidence.
To manage costs without sacrificing quality, consider phased approaches, multiple vendor quotes, and cost breakdowns that separate material, tooling, and production. Planning for prototyping and sample runs within the overall budget helps prevent surprises while allowing you to validate performance before committing to a larger run. Clear specifications and thoughtful negotiation are your allies in keeping patches affordable without compromising on quality.
Quality Control, Color Management, and the Production Run
In full-scale production, consistency is the watchword. Quality control checks should verify dimensional accuracy, color consistency across batches, edge finishing, backing adhesion, and durability after washing or abrasion tests. Establishing a robust color management workflow—using approved color references and consistent dye lots—reduces drift and ensures the final patches align with your brand standards.
Quality assurance can include pre-shipment inspections or a final random sampling approach to validate that each patch meets specifications. Coordinating packaging, labeling, and shipping timing during production prevents delays and ensures the patches arrive in usable condition for your product line. A strong QC process supports reliability and reinforces the value of your investment in custom patches.
Packaging, Shipping, and Post-Launch Longevity of Custom Patches
Packaging choices influence perceived value and user experience. Whether patches ship loose, in poly bags, or with protective packaging and care instructions, thoughtful packaging can elevate the brand while safeguarding the patch during transit. Attention to anti-counterfeit marks or branding on packaging adds an extra layer of protection and perception for your customers.
Long-term wearability depends on construction quality and end-user care. Providing clear care instructions (for example, machine wash gentle cycles and air drying) helps preserve color vibrancy and adhesion, especially for higher-use items like uniforms or outdoor gear. Encouraging testing under real-world conditions during the early stages can validate durability and support a positive post-launch experience for your patches.
Frequently Asked Questions
What is Custom patches 101 and how does the patch design process begin?
Custom patches 101 is a practical guide to turning an idea into wearable patches for brands, teams, clubs, and creators. The patch design process begins with Stage 1: concept and design—defining purpose, shape, size, colors, and attachment methods, and translating artwork into production-ready files (vector AI, EPS, or SVG). Supplying a clean vector file and a short style guide helps speed the process and reduces back-and-forth, supporting smooth custom patch production.
How does Custom patches 101 address material choices in embroidery patches manufacturing?
In Stage 2: Material choices and patch construction, Custom patches 101 explains how materials affect appearance and durability. In embroidery patches manufacturing you’ll select surface (standard embroidery, satin, or chenille), border (merrow edge or heat-cut), backing options (iron-on, sew-on, or both), and thread counts with color matching to minimize drift.
What is the role of prototyping in Custom patches 101?
Stage 3: Prototyping and approvals shows how prototypes test design, materials, and performance before a full run. Expect iterations to verify color accuracy against references, stitch density, edge integrity, legibility of details, and backing performance under washing. Prototyping helps set the production timeline and manage expectations, often using a patch production checklist during approvals. Note how this aligns with the Custom patches 101 approach to a predictable production path.
How does Custom patches 101 guide sourcing, factory communication, and the patch production checklist?
Stage 4 covers Sourcing, factory communication, and the cost picture. You’ll learn how material costs, tooling/setup fees, color approvals, MOQs, and per-patch pricing influence budgeting. Clear specifications and a patch production checklist improve QA and avoid surprises when coordinating with suppliers; provide artwork, color references, quantities, attachment method, and packaging needs. This mirrors the Custom patches 101 emphasis on transparent patch production.
What quality control and packaging guidance does Custom patches 101 offer for the production run?
Stage 5 focuses on production run and quality control (dimensional accuracy, color consistency, edge finish, backing adhesion, durability). You may request pre-shipment inspection (PSI) and sample runs. Stage 6 covers packaging and shipping decisions, such as protective packaging, care instructions, labeling, and delivery timelines for a smooth handoff. This supports efficient custom patch production and predictable costs.
How does Custom patches 101 address longevity, care, and budgeting for custom patches cost?
Stage 7 covers longevity, care, and wearer tips, explaining how backing choices and attachment methods affect durability across wash cycles. Providing care instructions helps end-users extend life. The guide also emphasizes budgeting by planning for care, testing, and potential re-runs, highlighting how decisions impact custom patches cost and total value.
| Stage | Key Points |
|---|---|
| Understanding the scope |
|
| Stage 1: Concept and design |
|
| Stage 2: Material choices and patch construction |
|
| Stage 3: Prototyping and approvals |
|
| Stage 4: Sourcing, factory communication, and the cost picture |
|
| Stage 5: The production run and quality control |
|
| Stage 6: Packaging, shipping, and delivery timelines |
|
| Stage 7: Longevity, care, and wearer tips |
|
| Practical tips to optimize your patch project |
|
| The value of a well-managed process |
|